Character Stats Kit Setup
Step 0 - Pre-setup
When migrated to your project, navigate to your GameState, if you don’t have one you can create one by creating a blueprint and searching for GameState Class.
Step 1
In your GameState, add the SaveComponent.
Step 2
In your PlayerController create a function called “CreateStatsUMG” and add a CreateWidget node with the Stats UMG and promote the output to a variable, and return that variable in the output of the function.

Step 3
In your PlayerPawn/PlayerCharacter add the component “StatsComponent”.
Step 4
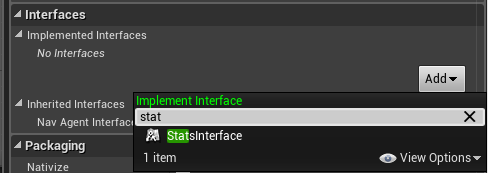
Also add the StatsInterface in ClassSettings of your PlayerCharacter.

Step 5
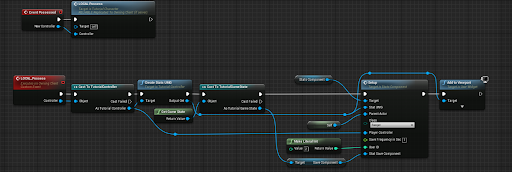
Next in the event graph of your Player Character, on Event Possessed, create a custom event OnOwningClient and Reliable with a controller input, cast this to your own controller and call the CreateStatsUMG Function, then cast to your own GameState and get the save component variable from there. Then call, from the StatsComponent, the Setup Node and connect the variables in their respective input.

At this stage if you press play everything should work without errors. If you receive “AsStatsInterface” errors, you forgot to add the Stats Interface in the Class Settings.
If at this stage, and you’re in 4.14 and up, the screen kind of freezes, you can’t move or do anything then go in your gamemode, click on file(left top), reparent blueprint and select GameMode, not GameModeBase.